The last post rushed through a lot of steps:
- Setting up an AWS account
- Creating an S3 bucket to store terraform state
- Making an administrator server role
- Starting a VM with the administrator role
- Installing terraform on the VM
- Running terraform to create a static site bucket
- Adding a file to the bucket, publishing it on the site
- Deleting the file to empty the bucket for cleanup
- Using terraform to clean up all the infrastructure
- Deleting the VM.
By getting through all those steps successfully, we proved that it's possible for someone with no prior experience to use state-of-the-art tools to build a cloud system. Now that we don't need to prove that anymore, we're going to take it slower, focusing on strengthening our foundations. This exercise is going to demonstrate how to use terraform to set up alarms on our AWS account to warn us if the projected costs start to get out of hand. To do this, we're going to need one more thing: a text editor[1].
Editor Setup
For this series, I'm going to use the Atom editor, which is available for free from its website. Because I want these instructions to be beginner-friendly, in this post I'm going to go into detail about using Atom to write terraform code. Feel free to ignore these instructions if there's a different editor you prefer. If you're going to follow along with these instructions, download and install Atom.
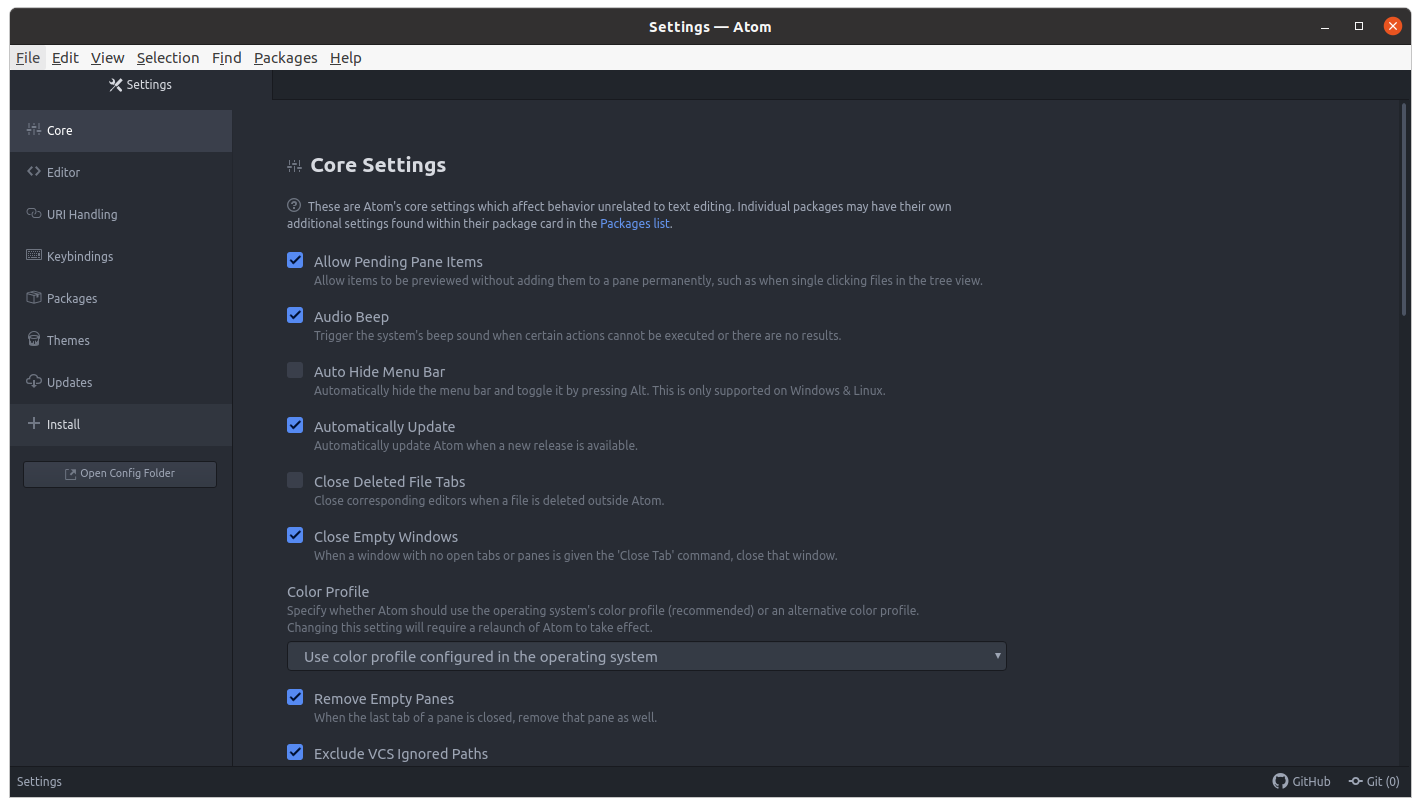
First, we're going to add syntax highlighting for terraform. Syntax highlighting is when an editor uses colored text to make code easier to read. First, open the preferences dialog and click on "Install" in the left-hand panel.
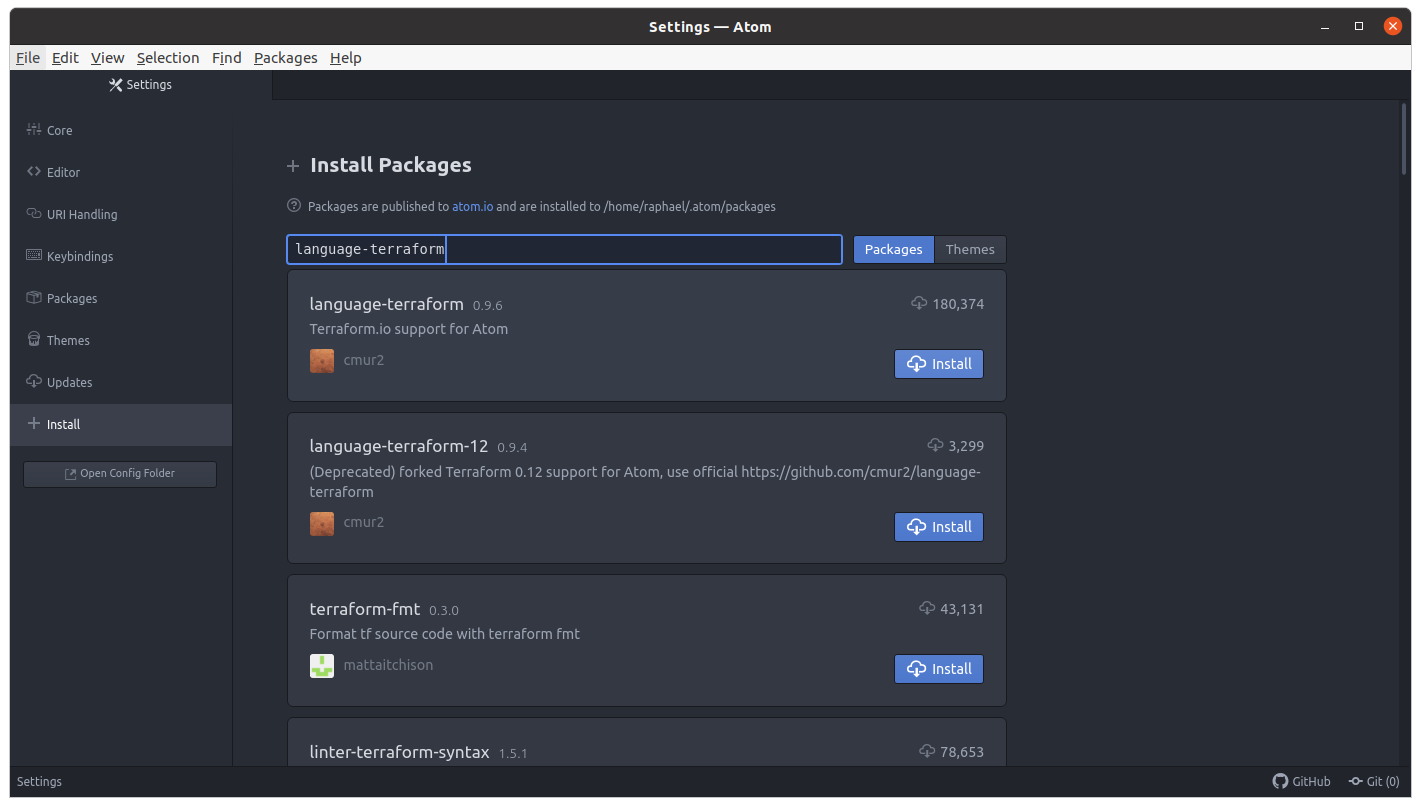
On the installation page, search for "language-terraform." Select and install that package.
Terraform Project Setup
Create a new file in the editor and save it as "budgets.tf." Add the following to the top of the file (notice that you need
to replace "{YOUR-TERRAFORM-STATE-BUCKET}" with the actual name of the terraform state bucket you created in the last exercise. If
you haven't done so yet, do it now and meet back here when you're done):
provider "aws" {
  shared_credentials_file = "/.aws/credentials"
  region     = "us-east-1"
}
terraform {
  required_providers {
    aws = {
      source  = "hashicorp/aws"
      version = "~> 3.0"
    }
  }
  required_version = ">= 0.13"
  backend "s3" {
    bucket = "{YOUR-TERRAFORM-STATE-BUCKET}"
    key    = "billing_alerts"
    region = "us-east-1"
  }
}
Notice that the "key" in the block above is "billing_alerts". In S3, key means file path. This configuration block tells
terraform to save the data associated with this stack in a file called "billing_alerts" in your terraform state bucket. Whenever
you start a new terraform project, you need to go through these steps to set a location for its state file. If you copy this
configuration block and forget to make a new state file path, terraform will think that you're trying to modify the original
stack and it will get confused.
Configuring Terraform Alerts
Now we're going to add the code to make the billing alerts. Terraform publishes documentation for all of the different types of infrastructure it lets you make. Today we're making a budget. Copy and paste the example resource definition from the terraform documentation page into your terraform file, underneath the existing configuration block.
resource "aws_budgets_budget" "ec2" {
  name              = "budget-ec2-monthly"
  budget_type       = "COST"
  limit_amount      = "1200"
  limit_unit        = "USD"
  time_period_end   = "2087-06-15_00:00"
  time_period_start = "2017-07-01_00:00"
  time_unit         = "MONTHLY"

  cost_filters = {
    Service = "Amazon Elastic Compute Cloud - Compute"
  }

  notification {
    comparison_operator        = "GREATER_THAN"
    threshold                  = 100
    threshold_type             = "PERCENTAGE"
    notification_type          = "FORECASTED"
    subscriber_email_addresses = ["test@example.com"]
  }
}
This is a resource block (in programming, "block" often refers specifically to a group of lines between curly braces--{}--although
it's also used informally to mean any paragraph-like "block of text"). Terraform uses the term resource to mean any thing that it can
create and manage. A resource block like this one starts with the word "resource", then the type of resource in quotes ("aws_budgets_budget"),
followed by a name for the resource that you can choose ("ec2", in the example). Each resource type has configuration options you can set
to control its behavior. To find out what the options are for a resource type, and see what settings are available, look at the documentation
page for the resource type. As mentioned earlier, the documentation for the "aws_budgets_budget" resource type is here.
Now that we've copy-and-pasted the example, we need to modify it so that it does what we want. First, let's pick a better name for the alarm.
A lot of the fields here are pretty self-explanatory. We can see that this example is a "COST"-type budget, which
means that it tracks the amount of money a service costs, as opposed to tracking a usage metric like the amount of data stored.
It sets a limit of $1200 USD, which we'll obviously want to change. It has an "end_date" in 2087, which is fine but kinda ridiculous[2].
The "time_unit" field shows us that this is a "MONTHLY" budget--that sounds like what we want, so we can leave that alone. It
has a "cost_filters" block that looks like it's restricting this to the EC2 service--we should check that the "cost_filters"
block is optional and then
we can just delete it. The "notification" block in the example is set up to email "test@example.com" if the "FORECASTED" cost
is greater than 100% of the limit. That logic is what we want--we just need to change the email. So these are the things we need to do:
- Rename the resource from "
ec2" to "overall" - Change the "
name" to "overall-monthly-budget" - Change the "
limit_amount" to a reasonable number--say $10. - Delete the whole "
cost_filters" block - Replace the email address in the "
subscriber_email_addresses" list[3] with our own email
When I finished, my whole file looked like this:
provider "aws" {
  shared_credentials_file = "/.aws/credentials"
  region     = "us-east-1"
}
terraform {
  required_providers {
    aws = {
      source  = "hashicorp/aws"
      version = "~> 3.0"
    }
  }
  required_version = ">= 0.13"
  backend "s3" {
    bucket = "rluckom-terraform-state"
    key    = "demo_s3_website"
    region = "us-east-1"
  }
}

resource "aws_budgets_budget" "overall" {
  name              = "overall-monthly-budget"
  budget_type       = "COST"
  limit_amount      = "10"
  limit_unit        = "USD"
  time_period_end   = "2087-06-15_00:00"
  time_period_start = "2017-07-01_00:00"
  time_unit         = "MONTHLY"

  notification {
    comparison_operator        = "GREATER_THAN"
    threshold                  = 100
    threshold_type             = "PERCENTAGE"
    notification_type          = "FORECASTED"
    subscriber_email_addresses = ["raphaelluckom@gmail.com"]
  }
}
Now it's time to apply this terraform configuration and make the alert. For this exercise, I'm assuming that you've already created your terraform state bucket and an admin role for your instance. If that's not the case, just follow the instructions in the previous post. Using those instructions, start an Ubuntu 20.04[4] instance (remember to apply the admin security role) and log in.
Once again, we're going to use a setup script to install terraform. It's a little shorter than the one from the last exercise[5]. Download the repository from github just like last time:
git clone https://github.com/RLuckom/practitioner-journey.git
Now cd into the directory "practitioner-journey/002" by typing "cd practitioner-journey/002/" and pressing Enter. Then execute
the setup script with elevated permissions:
sudo ./setup.sh
Now the next step is to run terraform with our configuration. This raises a problem. We've written a terraform configuration on our local machine, but now we need to send it to the VM where we're going to apply it. Let's use S3 to transfer the file.
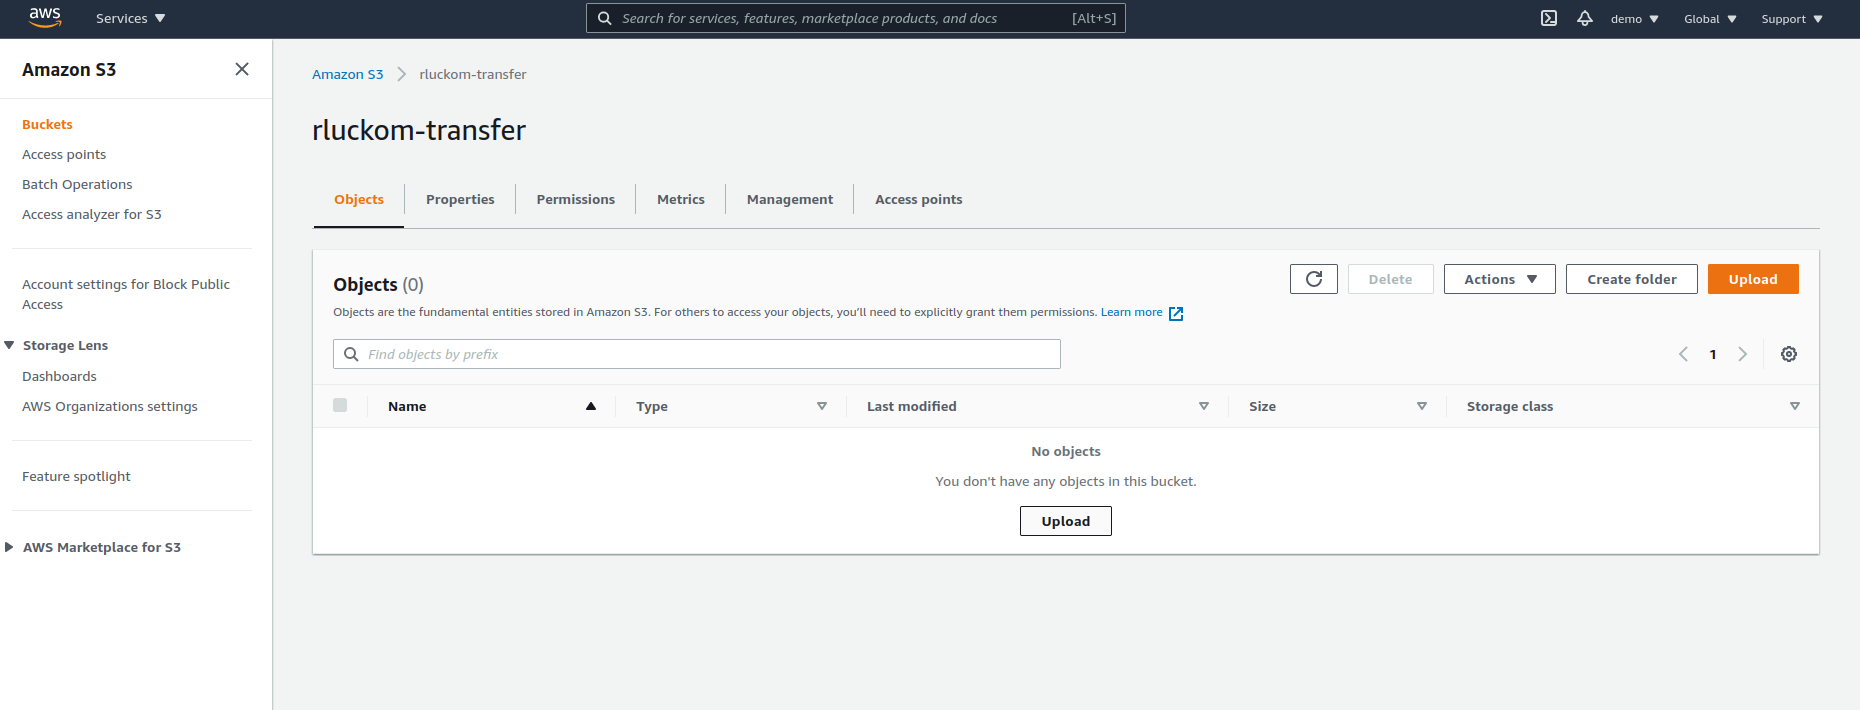
First, use the S3 console to create a bucket. This bucket is only going to be
used for ferrying files back and forth, so I'm going to name mine "rluckom-transfer"[6]. Unlike the state bucket, we don't need to enable
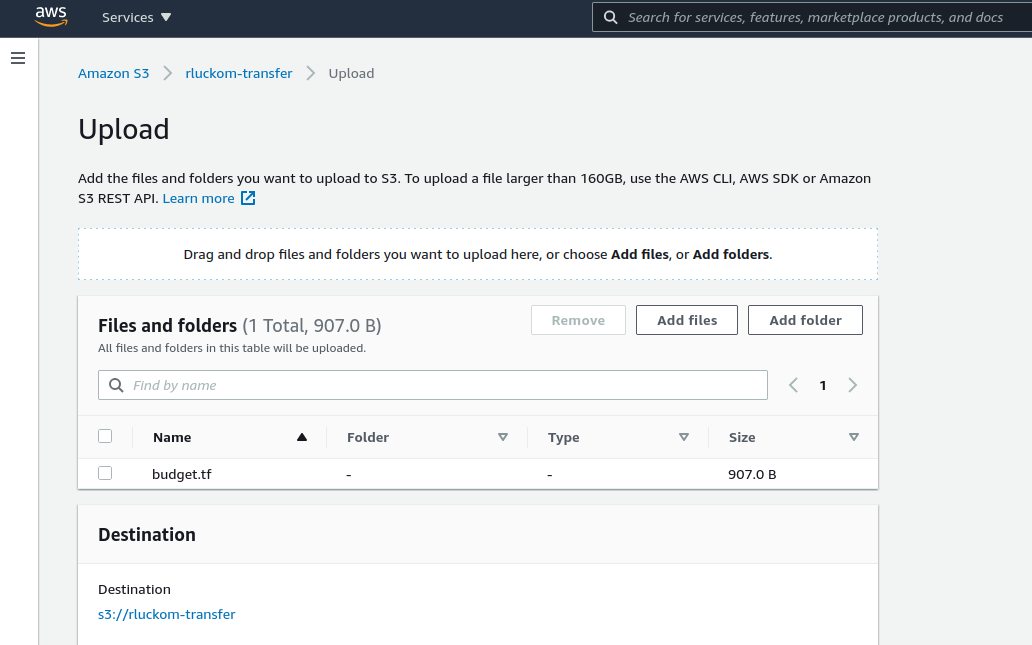
versioning--since this is a bucket for temporarily holding things, we don't want everything backed up forever. Save your terraform file as "budget.tf"
and upload it to the bucket using the S3 UI:
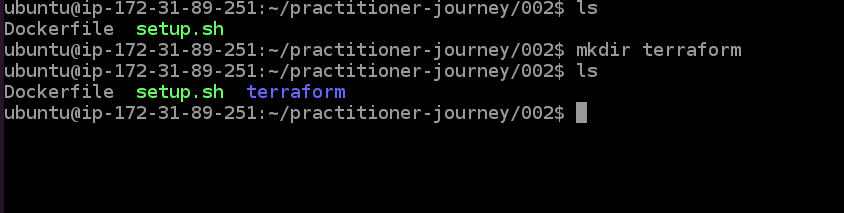
Now we can use the AWS CLI to download it onto our instance from S3. This is the opposite of what we did in the last exercise to put the
"index.html" page into the website bucket. First we're going to make a directory to put our file in. You should still be in the
"practitioner-journey/002" directory. Enter the instruction "mkdir terraform" to create a terraform directory, and use ls to see
that it was created.
Now enter "cd terraform" to move into the terraform directory you just made. We want to download the file we just put in S3, so
use the instruction
aws s3 cp s3://{YOUR-TRANSFER-BUCKET}/budget.tf budget.tf
(replacing the bucket name) to copy the file to
the VM. If you enter ls, you should see that the file has appeared.

Now run "terraform init" and "terraform apply", like last time, to create the budget. Type "yes" at the prompt.
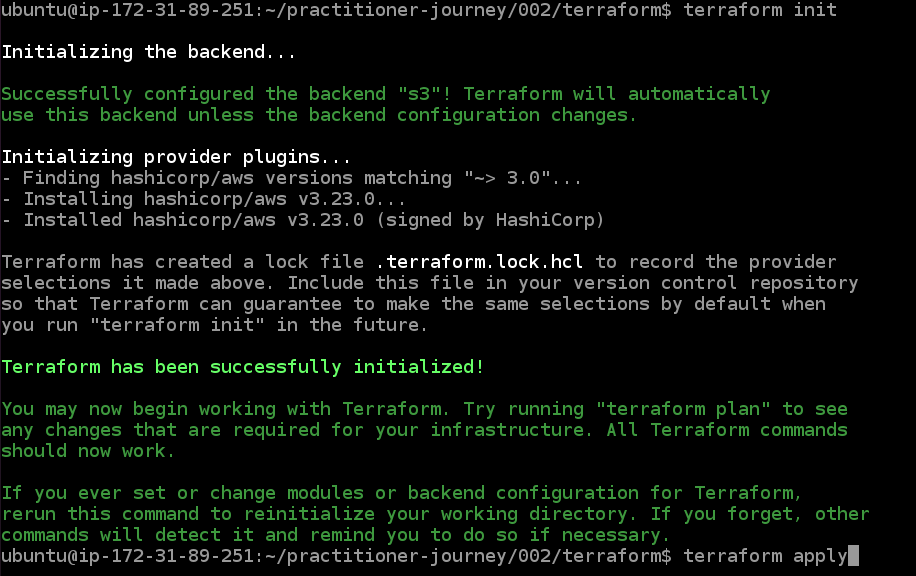
When terraform finishes running, you should see thast a budget has been created on
the budgets page. Since we're allowed
to have two free budgets according to the pricing page,
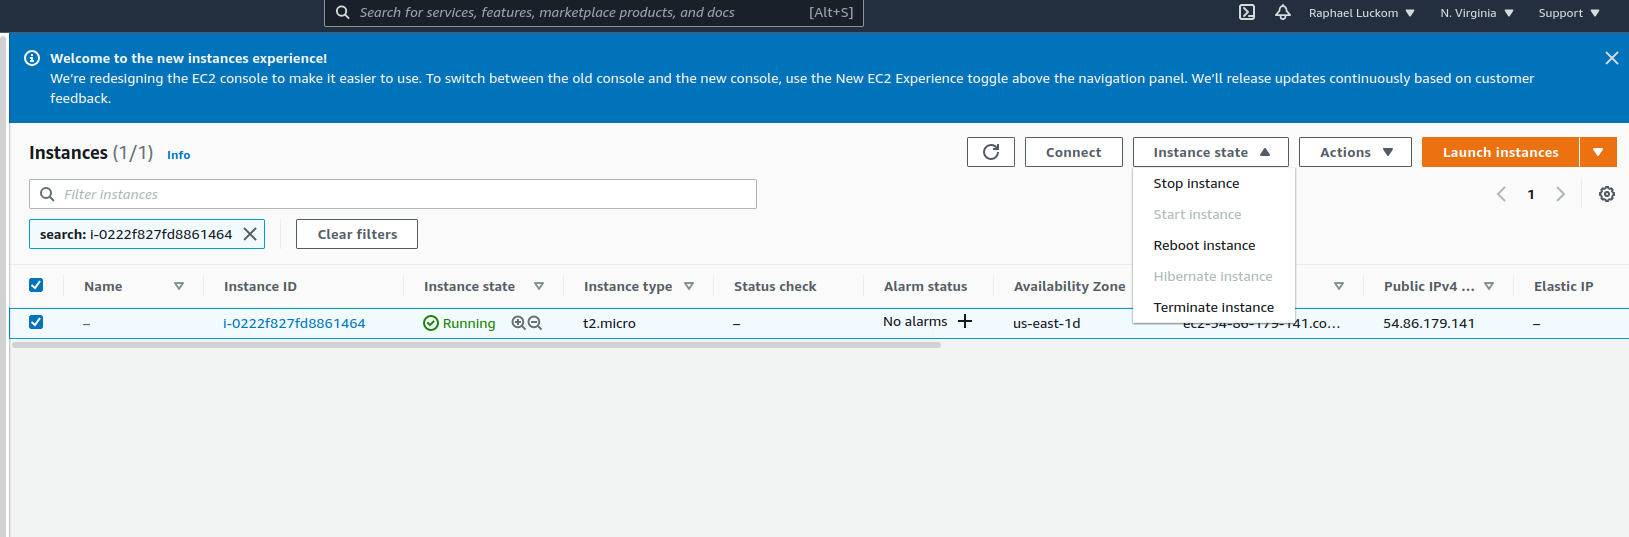
we're not going to use "terraform destroy" to delete the budget. But we do still need to shut down the instance
that we used to make it. Find the instance on the instances page.
select it using the checkbox in the list, and use the "Instance State" dropdown to terminate it.
Conclusion
These first two exercises establish a development cycle--a repeatable way to write down an idea, try it out, and revise based on the results. This is not the only way to do these tasks--I present this development cycle specifically because it uses a small number of highly predictable parts, and doesn't depend much on what computer you're using. As you continue on this path, always be open to trying out different development cycles until you find the one that works for you.
This post went into a lot of detail about the specific terraform code we used. As we start looking at more complicated systems, we're not usually going to walk through each individual terraform resource. Instead, I'll try to explain how a particular system or component works, and present some pre-written terraform code that demonstrates the system under discussion. If you're interested in a more in-depth terraform conversation, feel free to get in touch--I can always use a hand.
As far as I'm concerned, there is one requirement for a coding text editor: it should not replace "straight quotes", '
""' with "curly quotes" '“”'. This is very important--if you end up with curly quotes in your code, either through copy / paste or because your editor uses curly quotes automatically, your program will probably not work, and it can take hours to notice the problem.Everything else that anyone says about one editor being better or worse for coding than another is preference. Part of respecting diversity--and I'm insisting on this as a person with a physical disability-- is not trying to "teach" people our preferences. Instead, we should try to be explicit about which things are functionally important, like straight quotes vs curly quotes, and which things are simply matters of preference, like which editor is most pleasant to use.
I'm choosing to use the Atom text editor for this series because it is free, adequate, and I think that its popularity means that these examples won't go out of date for a while. ↩︎
Usually, when you see a number like that in this kind of documentation, the author is trying to make a point--in this case, they're highlighting that any four-digit future year can be used. ↩︎
When you see square brackets in code, they usually denote a list, or an array. These let you specify multiple values for a single field, as quoted strings separated by commas. For instance, you could set multiple email addresses in the "
subscriber_email_addresses" field by writing them as "["email-1@example.com", "email-2@example.com"]". ↩︎Ubuntu versions are released every six months in April and October of each year. The 20.04 release is the April 2020 release. The April release in even-numbered years is a Long-Term-Support (LTS) release, which means that it wil be supported with security and feature upgrades for five years. As I write these exercises in January 2021, 20.04 is the most recent LTS version. All of these instructions will likely work for future versions as well. ↩︎
The script in the last exercise asked you to fill in the terraform state bucket name, and then used it to autogenerate the terraform configuration code. Since we included that configuration in the file we wrote, we don't have to do that as part of the setup script. ↩︎
Like the terraform state bucket, I'm creating this bucket through the UI because I need it for running terraform. I avoid using terraform to make things needed by terraform to stay away from chicken / egg scenarios. ↩︎